

The sole aim behind conducting this experiment in my apartment was to check whether the compost culture sold by Gandhi Krishi Vignana Kendra (GKVK) located in North Bangalore can work just as good as any other culture/accelerator sold by vendors/innovators in the city.
Well, it does. At a much lower cost!
In general, microbial solutions–be it in powder form or liquid–are meant for accelerating composting. One should understand that composting will eventually happen but when we carry out the same in a controlled environment to compost large quantities, too many dos and don’ts sneak in.
Some of the concerns are foul odour, maggots in numbers one can’t simply handle and moisture seeping out of the containers or cement tanks. This is when neatniks bid a goodbye to composting itself and start looking for easy but hazardous solutions like automatic composters.
Infrastructure
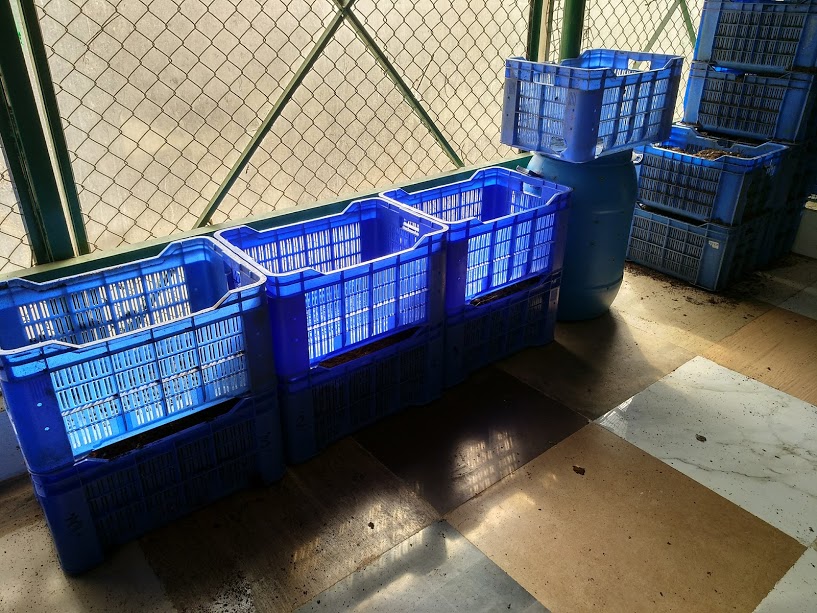
I used three plastic milk crates and one 300-litre barrel with holes. The barrel had a lid without sufficient holes in it.
Method
GKVK sells various types of microbial consortia meant to serve different purposes to help the farming community. Although I have been using some of these for years now (please read this post), the compost culture remained untested. At the Department for Popularisation of Biofertilisers located on the GKVK campus where these microbes are sold, no one offered information on how to carry out composting using their culture. When they did, it was vague and incomplete. So thought of relying on my experience to get going.
I bought a cocopeat block of approximately 5 kgs, moistened it and added 5-6 spoonfuls of GKVK compost culture. (Ideally, it’s better to leave it unused for at least 10-15 days to help the microbes colonise the moistened, crumbly cocopeat.)
CRATE #1: Unshredded kitchen rejects. NO cocopeat. Only dry leaves. Spread a 5-inch-thick layer of dry leaves at the bottom. Mix the unshredded kitchen rejects with a spoon of compost culture. (A tip: To make sure the powder gets uniformly coated on the rejects, first mix it in a handful of cocopeat (or sawdust) and then mix it with the rejects). Fill the crate with this and add another 5-inch-thick layer of dry leaves on the top to prevent fruit flies hovering over it.
Note: I didn’t add cocopeat here as some residents who carry out composting in pits, cement tanks do not use cocopeat. Dry leaves are easily available and are a significant source of carbon.
CRATE #2: Unshredded kitchen rejects. Spread a 2-inch-thick layer of inoculated cocopeat. Mix the unshredded kitchen rejects with the cocopeat at 3:1 ratio (3 parts kitchen rejects : 1 part cocopeat). Fill the crate with this and add another 2-inch-thick layer of inoculated cocopeat on the top to prevent fruit flies hovering over it.
CRATE #3: Shredded kitchen rejects. Follow the same steps as in Crate #2.
BARREL: Drill the barrel with enough holes to ensure adequate aeration. A few at the bottom are essential to help excess moisture seep out. Add shredded kitchen rejects. Follow the same steps as in Crate #2.
All the four containers were placed in a dry, well-aerated and rodent-free room.
One week later…
Significant reduction in the quantity, reduced to half of its original volume. I could see fungal mold right below the top layer. The middle and bottom portions had a good deal of heat built up. The substrate turned black, almost.
In Crate #1, composting is progressing. No leakage of leachate despite the fact that there was no cocopeat in it to absorbs extra moisture. No maggots jumping out of the crate. When I lifted the crate, I saw a thin layer of moisture at the bottom and some worms.
In Crate #2, saw quite a few maggots. Substrate had turned black. Needed more work. The same was the case with the barrel.
Two weeks later…
Another 10-15% of reduction in the substrate quantity. Didn’t see further fungal mold build-up in any of the containers. Good amount of heat. No foul odour in any of the containers. Composting in Crate #3 which had shredded rejects was happening at a faster pace. Almost smelling like compost. But there still were semi-composted chunks in it. Needed more time.
Three weeks later…
Crate #3 done! The leftover semi-composted chunks can be thrown into the next batch. The remaining containers were doing good. One more week, the job will be done. What surprised me the most was Crate #1. No smell whatsoever. No fruit flies. No excess moisture seeping down. When held in hand, it had a good deal of moisture. Extremely pleasant smell. Since it was not shredded or treated with cocopeat, the substrate was sticky but not dripping wet. The dry leaves would take much longer to decompose but the rest of the kitchen rejects were undergoing transformation quite fast.
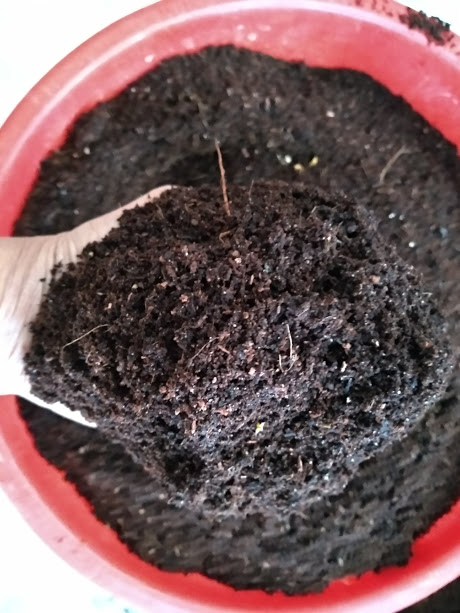
The result
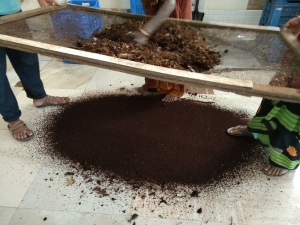
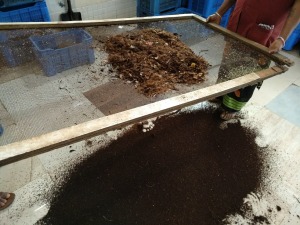
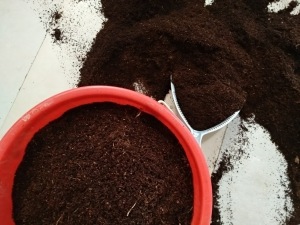
When Crate #2 And #3 were sieved, this is what we got after exactly three weeks. Almost 75% of the substrate turned into compost with around 25% of semi-composted material to be processed further. This will at least take a couple more weeks if you want to reduce it to a crumbly texture as this. Otherwise, you can generously feed the chunks to large bushes and trees in your garden. With constant watering, composting will keep on happening even as it releases nutrients to the roots and keeps the microbial activity on a constant uptick.


The cost
For nearly 40-50 kgs of raw material, I have used not more than 12-13 kgs of plain cocopeat and 5-6 spoonfuls of compost culture which is sold at Rs 80/kg. If you are handling greater quantities of kitchen rejects, then try using processed cocopeat bags sold in Majestic area, Bangalore. One particular vendor told me that unlike the blocks which can give you anything between 20-25 kgs of cocopeat when disintegrated, the bags have exactly 25 kgs of cocopeat with the right degree of moisture in it. This cocopeat is sold as a growth medium at Rs 150 per bag. You don’t have to deal with moistening the block and then crumble it to get started.
The actual outgo
At 1:3 ratio (inoculated cocopeat: kitchen rejects), to compost 100 kgs, you will be using 33 kgs of processed cocopeat at Rs 150/bag of 25 kgs each and a generous 100 gms of compost culture per day (Rs 8). The total cost/day works out to around Rs 208. Rs 6,240 per month (transportation cost excluded). If you are using cement tanks, instead of cocopeat, just add crushed dry leaves and a few spoons of culture each day. It works out even cheaper. But the turnaround time will be longer. For the next batch, you can use the same compost with a spoonful of culture thoroughly mixed. Make sure the compost always remains moist. Only then do the microbes remain alive.
A sweet-smelling success!


Awesome! Another option for home composting !
LikeLiked by 1 person
Yes! Another experiment is going on using the same culture and cocopeat in a plastic container at home. Went for layering method in this instead of mixing. It may take another 2 weeks to be ready. Will blog about that too. This will cost not more Rs 2-3 per day, I am sure. 🙂
LikeLiked by 1 person
Another idea. You could use this culture for your Rainbow method. If you do, do let me know how it worked? Thanks.
LikeLike
Hi savita,
great experiment , will try on my system ( based on Rainbow method ) but getting the gvk compost culture to Gurgaon is a challenge , any suggestions ???
LikeLiked by 1 person
I know this is an issue for those living in other states. You will have to find someone to courier you some 5kgs at once to cut costs. Else, only courier charges were 450 bucks when I sent a kg of it to someone in Mumbai.
LikeLike
Well documented Savitha. I am sure we should be able to use this culture for leaf composting too. If so how much to use. Would you be able to guide please. This without cowdung wanted to see possibility as option and whether its going to be cost effective and fast? In our complex we get 4 bags (app 120kg) cowdung at rs 400. Regards Lakshmi
LikeLiked by 1 person
Dear Lakshmi, most of these cultures suit cooked waste better, both veg and non-veg. Here’s what you can do: Conduct a small experiment using 10-15% of kitchen waste mixed thoroughly with the GKVK compost culture and your garden leaves. Do it in a small container first and then see how it goes. To ward off rodents from the kitchen scraps, sprinkle some thin dung slurry (just a little to moisten it) and mix it thoroughly. Let’s know the results. Would love to hear it from you.
-S
LikeLike
Thank you . Just exactly what I was looking for. Your blog can now help me resort to my own diy microbe blocks to accelerate composting
LikeLiked by 2 people
Nice to know! 🙂
LikeLike
Dear Endlessly Green, I’m in Pune in a small condo with just 7 flats occupied. We get a lot of leaf waste from trees all over around the building and surrounding area. The building have had 2 cement pits made which are now out of use. I moved in a year and a half ago. I would like to restore them and restart the composting of garden waste and home wet waste. Am getting the pits cleared of the rubbish that’s been filled in, in the next two weeks. I am having difficulty, through, getting help which is reasonable. Inora which provides a monthly maintenance service is way too expensive. If the GKVK compost culture is really good, I would order it from B’lore. Would love any suggestions.
LikeLiked by 1 person
Dear Tehnaz, GKVK does not courier the products. That’s an issue they must solve. Meanwhile, I got info on some more bioenzymes which also reportedly do a very good job. I will test a couple of them and write a post. It will take time though. You please write to endlesslygreen360@gmail.com. I will pass on the info of some vendors. I don’t want to publish the details here on this blog before testing. I will write only if they live up to the promise. Thank you. Good luck. 🙂
LikeLike
I was so thrilled after reading this page that I carried myself and unsuspecting friend over to GKVK last Saturday. As you stated, the Department for Popularisation of Biofertilisers (why couldn’t they name it something like Beneficial Bugs Bureau? or Musth Microbes Multiplication/Manufacturing???) is very strategically located in the campus – which leads you to wonder why a department that is meant to popularise something is hidden into a hard-to-find corner of the vast campus. Strange, but the nice ladies working there did not seem to understand the strategic nature of their work or probably were very humble about their profession.
Bought some of the microbial culture and the compost starter and this, in a solution of water, has been sprinkled onto a 200 liter drum containing 100 something litres of dry leaves. Just one day later, the smell of the leaves has changed from dry dust/leaf to petrichor. Gotta see how this turns out.
After that, I got manic about this microbial culture and sprayed a solution onto every plant I have at home (an awe inspiring collection of 3 12-inch flower pots) at the present. I want to see how the plants take to the inoculum.
LikeLiked by 1 person
Thrilled to read your comment! Please do keep me posted on the progress. 🙂
LikeLike
There’s a sudden increase in the number of new leaves on the ajwain/oma plant after I added the culture to this pot. Teh thai basil plant seems to have gone insane producing flowers, seed pods and new leaves…..I’m a convert!
LikeLiked by 1 person
Did you add the compost culture directly to the plants? How much? Need details please.
LikeLike
One pinch of culture in 300 ml water, poured about 4 inches away from the plant base. You should probably try with leafy greens.
LikeLiked by 1 person
Will surely try. 🙂 Thank you.
LikeLiked by 1 person
The leaves were about 95% rain tree (Albizia Saman) and about 5% mango leaf. After introduction of the inoculum, the mass has become hot (some 55-odd degree celsius) and decomposing rapidly. They were just loaded into a drum – on a whim I stuck a perforated 4 inch pipe into the mass and the heat built up like a rocket. The leaves have become a dark colour and reduced in volume about 40%. Let’s see where this goes. Will update.
LikeLiked by 1 person
I want some!
LikeLike
PM-ed you.
LikeLiked by 1 person
Where in Majestic is the “processed cocopeat bags sold in Majestic area, Bangalore”?
LikeLiked by 1 person
In any of those fertilizers shops.
LikeLiked by 1 person
Have any body tried composting with Black Soldier Fly ?
LikeLike
None that I know of.
LikeLike
Can you please provide me with a contact from GKVK from where I can get the accelerator?
LikeLike
Hi, you will have to go to Microbiology Dept. Sorry, I don’t have their number.
LikeLike
Hi Savita ji, we are trying our hand at community composting (I am from Hyderabad – we spoke over phone recently). We found someone supplying coco peat in bulk quite cheap. The only concern is that the coco peat comes from tender green coconuts, not from ripened brown coconut husk. Will it be ok to use it?
LikeLiked by 1 person
Dear Sanjay,
Yes, I remember our conversation. Sorry, I don’t know about the difference between the two types of cocopeat. I suggest you do this: get the cocopeat tested for its electrical conductivity at a soil testing laboratory. If it turns out normal, then use it for composting a small quaitity of kitchen waste. Once the compost is ready, get it tested for some more parameters apart from EC. I will give you details once the compost id ready.
LikeLike
Thanks, Savita ji. Yes, I will try out your suggestion. We have started using this coco peat, primarily because we are doing it on a small pilot scale, so we have some leeway to experiment. I raised this question because we are facing a small smell problem, and I posted a picture of fly larvae on the WhatsApp group. We are confused what to change (for example waste-to-coco-peat ratio, or the coco peat itself). We will try the GKVK microbes too, as soon as we find a way of getting it. Madhumita ji, whose posted a question above about GKVK, is another volunteer from the same community. Anyways, I will keep you posted how things turn out.
LikeLiked by 1 person
If you are composting without any accelerators but only plain cocopeat, you will face problems of smell and maybe, excess maggots too.
LikeLike
Please get in touch with Green Community Foundation. They may help you. Good luck.
LikeLike
Is this GKVK microbial consortia available outside of Bengaluru or online?
I’m from Kolkata. Is there any way to get it delivered to Kolkata
LikeLiked by 1 person
Please write to info@endlesslygreen.in. Thanks
LikeLike